

This past Thanksgiving was kinda bonkers. I contributed by making rolls, a braided danish, a fricken amazing Greek salad, herb compound butter (fancy!), and I don't even know what else. Maybe that was it...but it doesn't feel like it.
Know what else is bonkers? I'm seriously considering making 200 or whatever of these for my graduation party next year. I'm seriously thinking of kneading several batches of dough, sticking bowls of it all over the warm spots in my house, separating them into little spheres, knotting all of the said spheres, letting them rise on several million cookie sheets, glazing them, baking them, and freezing them; using up an ungodly amount of bread flour in the process.
Worth it? Oh, I definitely think it could be. Can't you see these slathered in butter and oozing with BBQ pork? Or maybe some crazy shredded roasted garlic rosemary chicken?
Somebody save me from myself.

Now, that last large paragraph might've overwhelmed you. Don't worry, you're not in charge of my party! Being in charge of making ten of these darlings is a lot more feasible. Don't freak, that's my job.
This is a yeast dough, and I'm not gonna lie, gauging when it's the correct texture will take some practice! But these rolls are as good a place to start as any. The recipe below is for an electric stand mixer, but you can absolutely use your hands! It will take a few minutes longer, but you'll also have some nice direct contact with the texture of your dough. But when you're comfortable with recognizing the appropriate texture, I recommend letting the stand mixer do the job, especially if baking in large quantities.
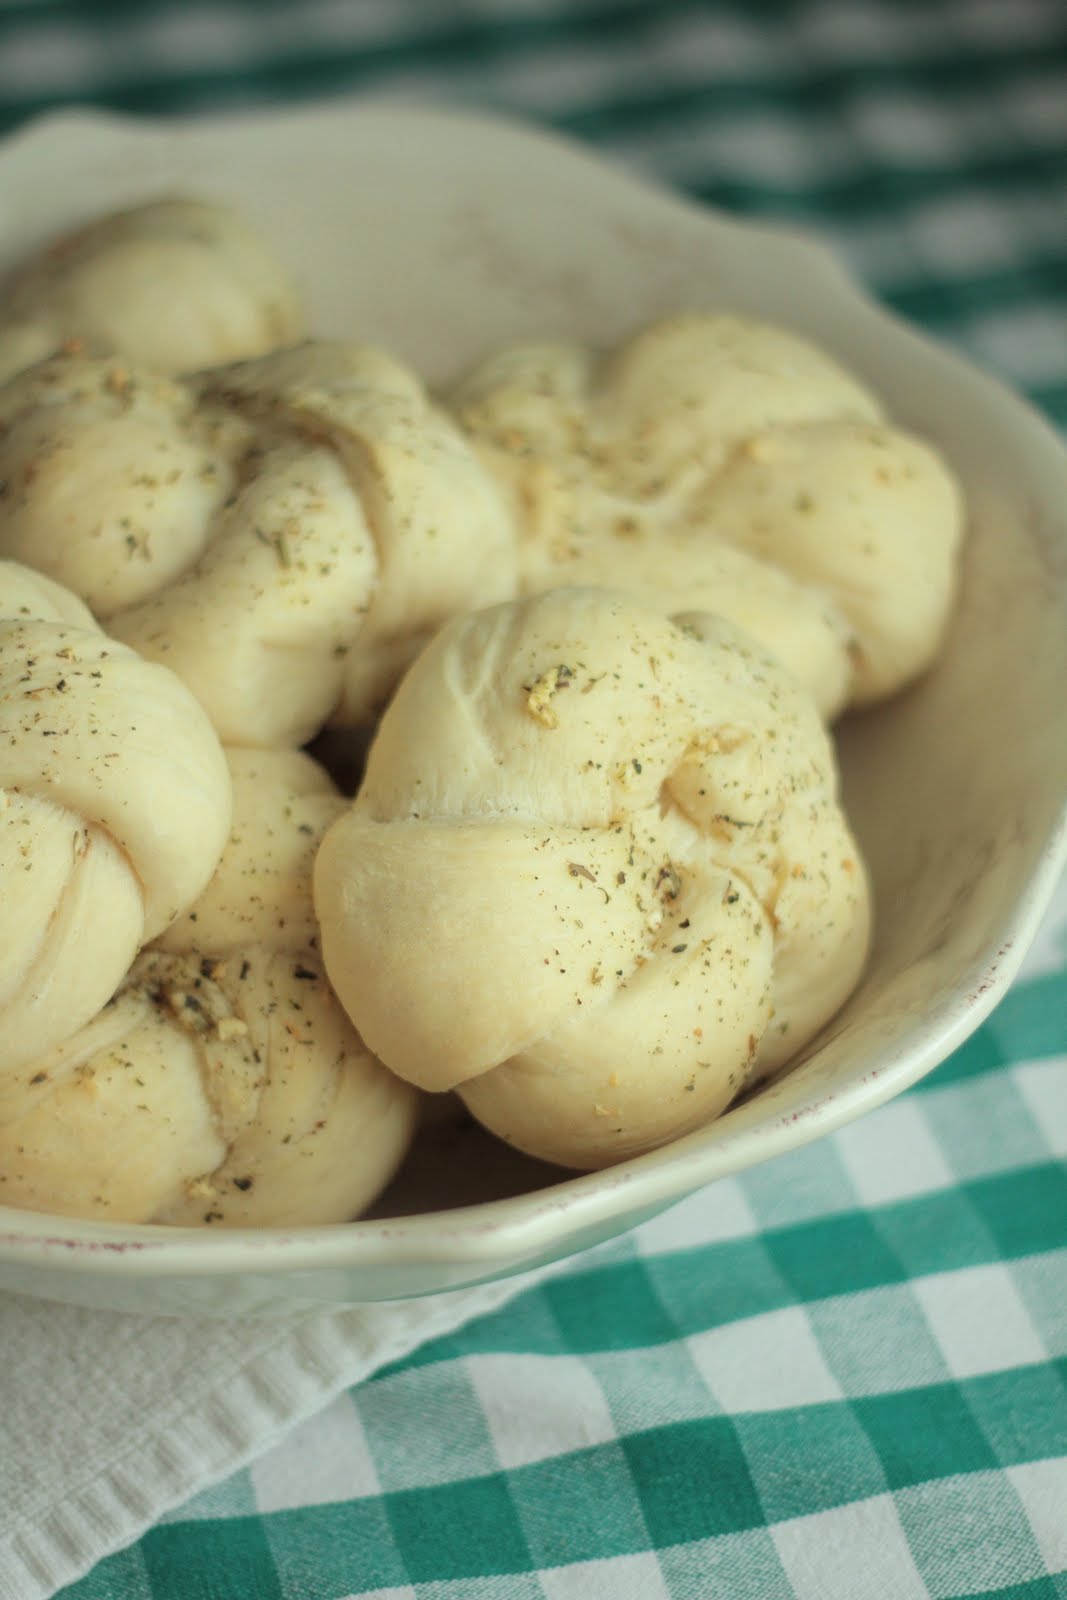
Knotting the dough also requires a few tries, but the end result is so pretty! It's definitely easier than it looks. It's also best to do it in fluid motions, instead of stopping every step to take several pictures, heh. But the said pictures should make this easier on you, don't be scared! I'm here to help you along, we can totally hold hands.
Also, in these photos it's hard to tell, but my rolls do have a slight golden brown tint! I usually go a little darker, but I was just short on time with this particular batch. Check out Annie's rolls here to take a peek at her beautifully browned ones. However dark or light, these are bound to be amazing.
Soft Buttermilk Garlic Knots
Yield: 10 rolls
Ingredients for the dough:
- 3 cups bread flour, plus more as needed
- 1 tbsp. sugar
- 2 tsp. instant yeast (AKA bread machine yeast)
- 1¼ tsp. salt
- 2 tbsp. olive oil
- ¼ cup buttermilk, at room temperature
- 1 cup plus 2 tbsp. lukewarm water
Ingredients for the glaze:
- 3-4 garlic cloves
- 4 tbsp. (1/2 stick) melted butter
- ½ tsp. Italian seasoning
Directions:

To make the dough, in the bowl of a stand mixer fitted with the paddle attachment, combine the dry ingredients on low speed.

Add the olive oil, buttermilk, and water. Mix until ingredients have formed a dough.


Switch to the dough hook and knead on low speed until the dough is smooth and elastic, tacky but not sticky; about 8 minutes. When poked lightly, your finger should adhere to the dough for a moment, but come out clean. If your finger comes out with dough on it, the dough is still too sticky; knead in more flour a tablespoon at a time until you reach the correct texture (if your dough is sticking to the bowl, that's also an indicator that it's too sticky). The amount of extra flour you'll need will depend on the humidity of your environment and how heavily or lightly you measured the flour.


Transfer the dough to a lightly oiled bowl, turn once to coat, and cover with plastic wrap. Allow to rise for about 1 hour, or until doubled in bulk.

Get out a baking stone, or line a baking sheet with parchment paper. Punch down the dough once to deflate, then turn it out onto a lightly floured surface. Divide the dough into 10 equal pieces.


Roll each piece into a 10-inch long rope and tie into a knot.

Turn the knot over, if necessary, so the tied side is facing down.


Take the end lying underneath the knot and bring it over the top, tucking it into the center.

 |
| Tucked into the center of the bottom |

Place each knot onto the baking stone or prepared baking sheet. (Don't worry if the knots that got done earliest start to puff up before you've finished, making the rolls you so meticulously sized seem uneven; they just like to rise, especially on hot days. They'll all puff up and eventually catch up with each other.)


Cover with a clean kitchen towel and let rise for 45 minutes, until puffy.
Once the rolls are puffed, preheat the oven to 350 degrees F. While the oven heats, make the glaze. Finely mince the garlic or press it through a garlic press. Mix with the melted butter and Italian seasoning.


Brush the glaze onto the shaped rolls.

Bake until set and lightly browned, about 15-18 minutes. Let cool slightly before serving.
Sources: adapted from Annie's Eats, who adapted it from Amber's Delectable Delights, originally adapted from King Arthur Flour